🔒 Upload Encrypted Data
Lighthouse Walrus uses SEAL to perform client-side encryption and decryption. Files are encrypted on your device before they leave it, so only encrypted data is transmitted and stored.
- UI
- Code
Uploading an Encrypted File
Follow these steps from the Lighthouse Files Dapp:
Step 1: Turn On Encryption
Before uploading, toggle Encryption to ON. This activates SEAL's client-side encryption pipeline for your upload session.
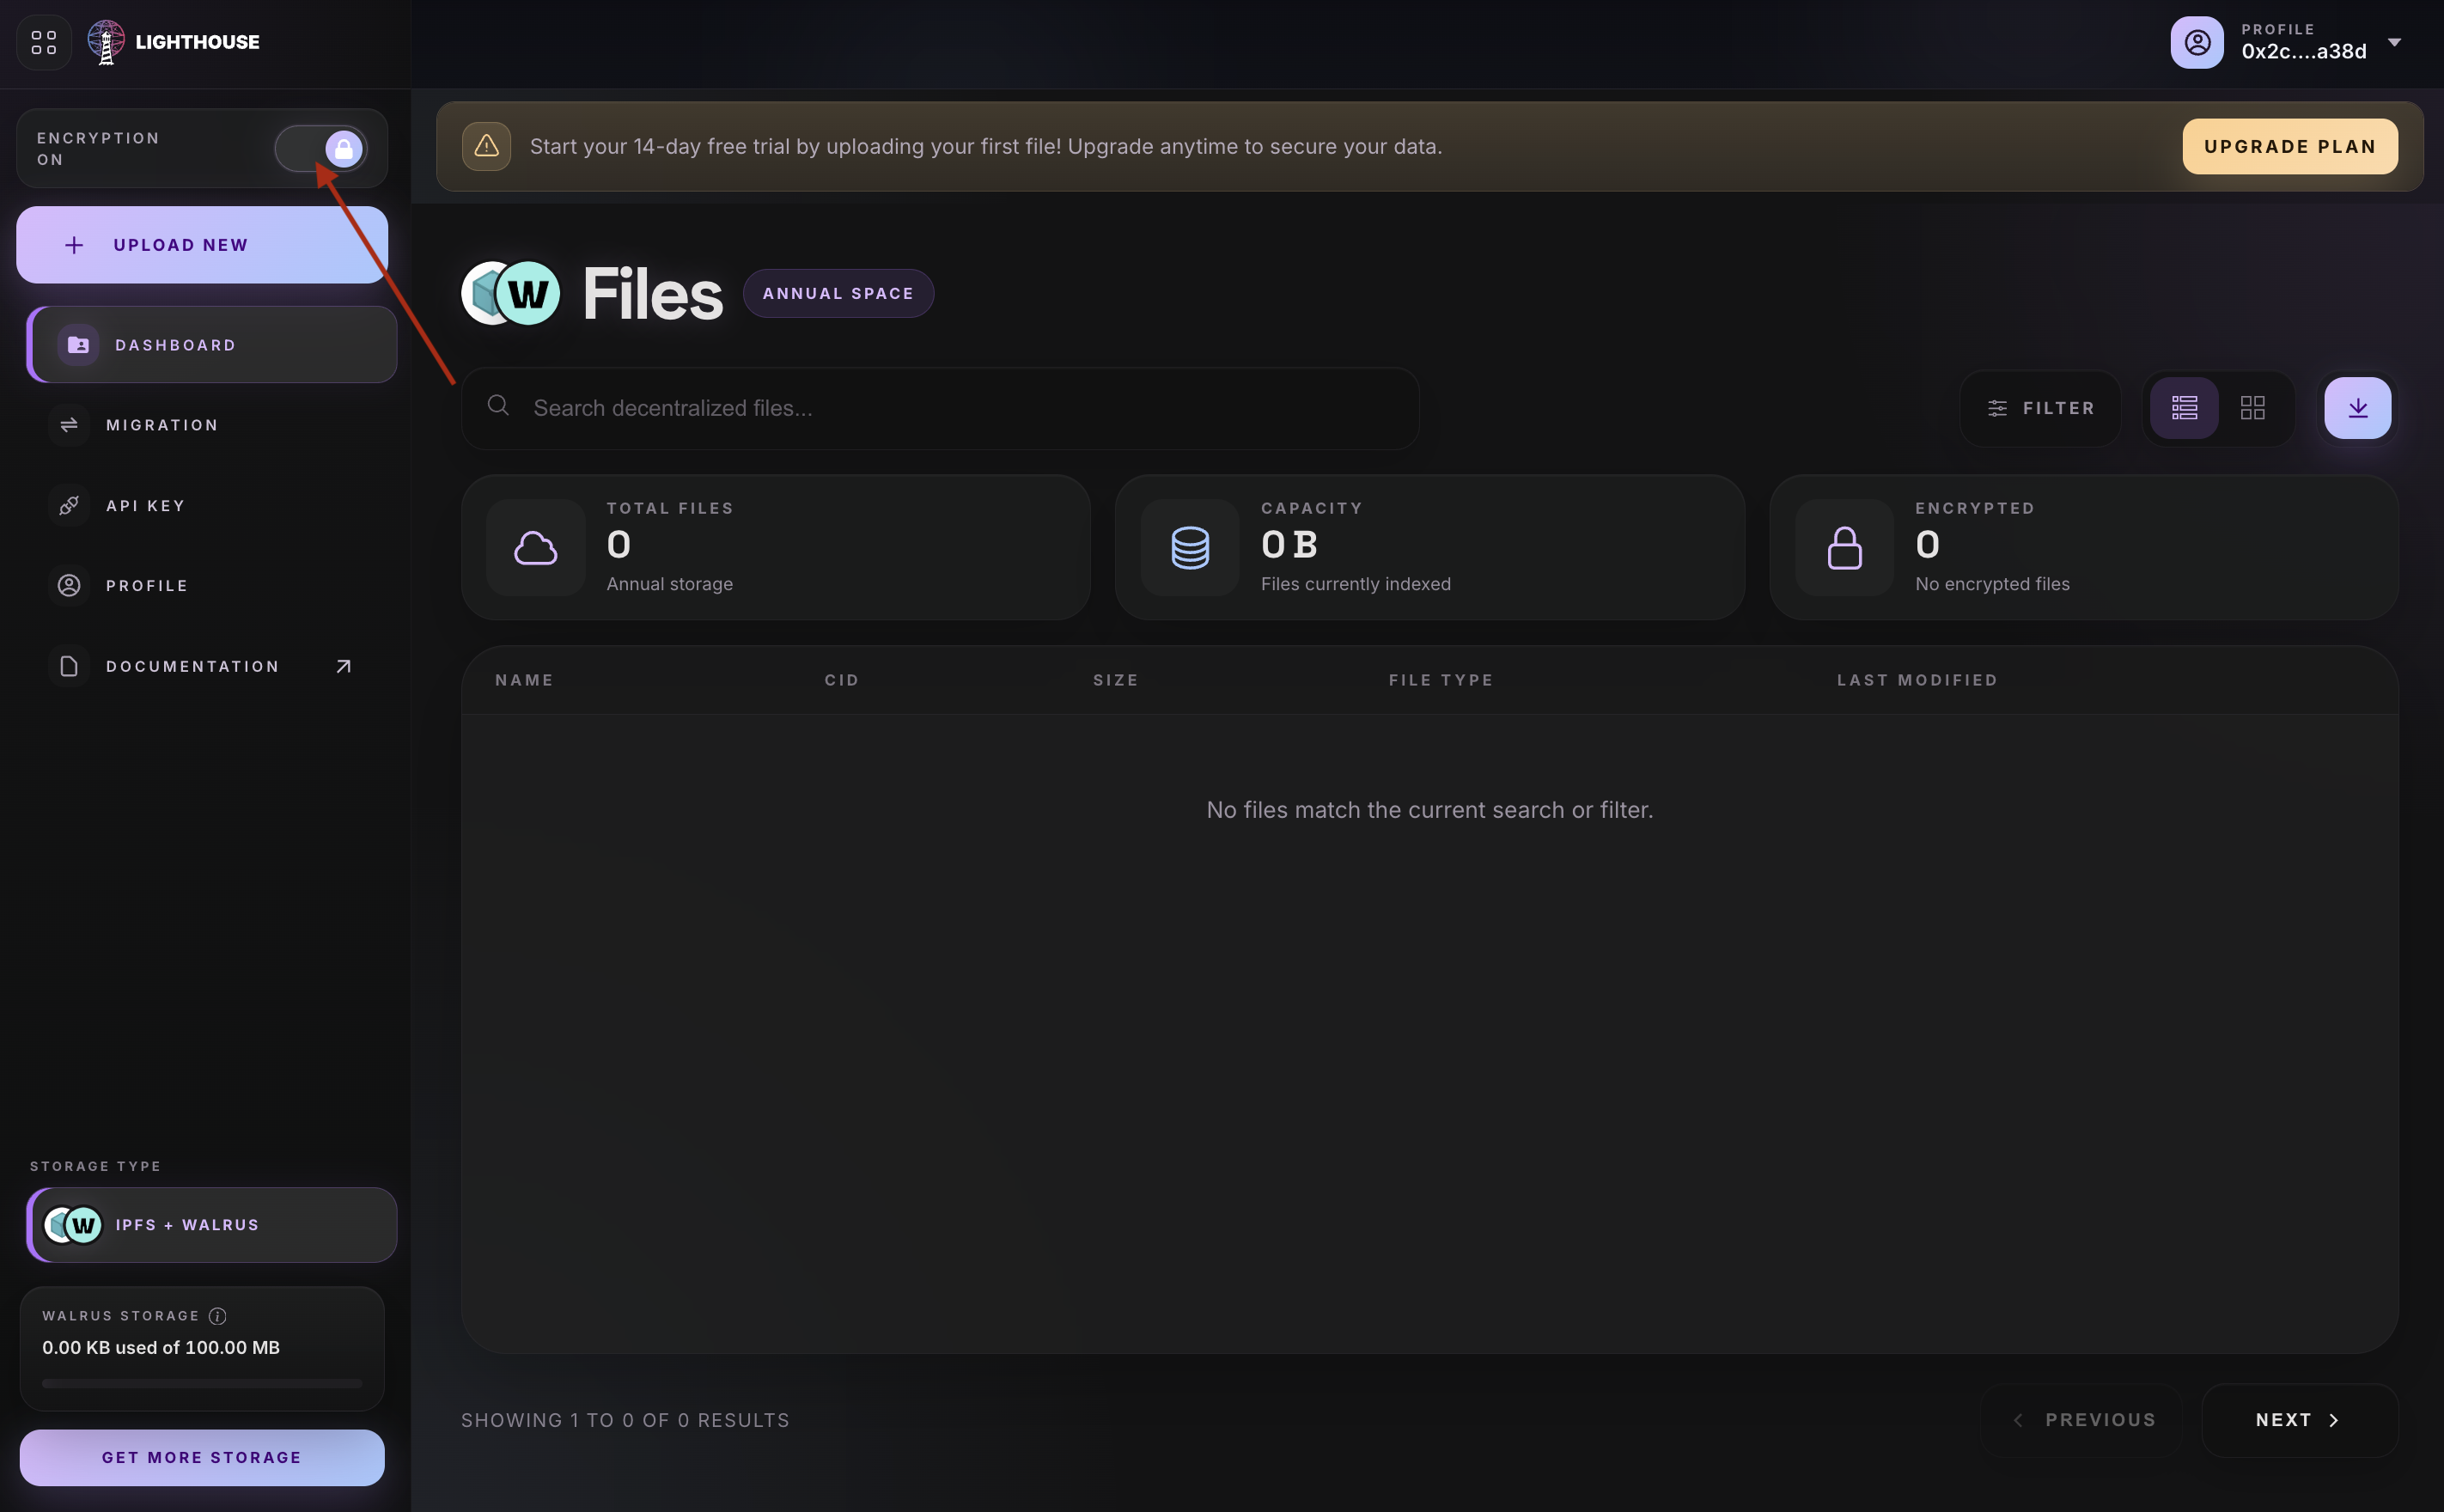
When encryption is enabled, a lock icon will appear on the toggle button, confirming that your next upload will be encrypted end-to-end.
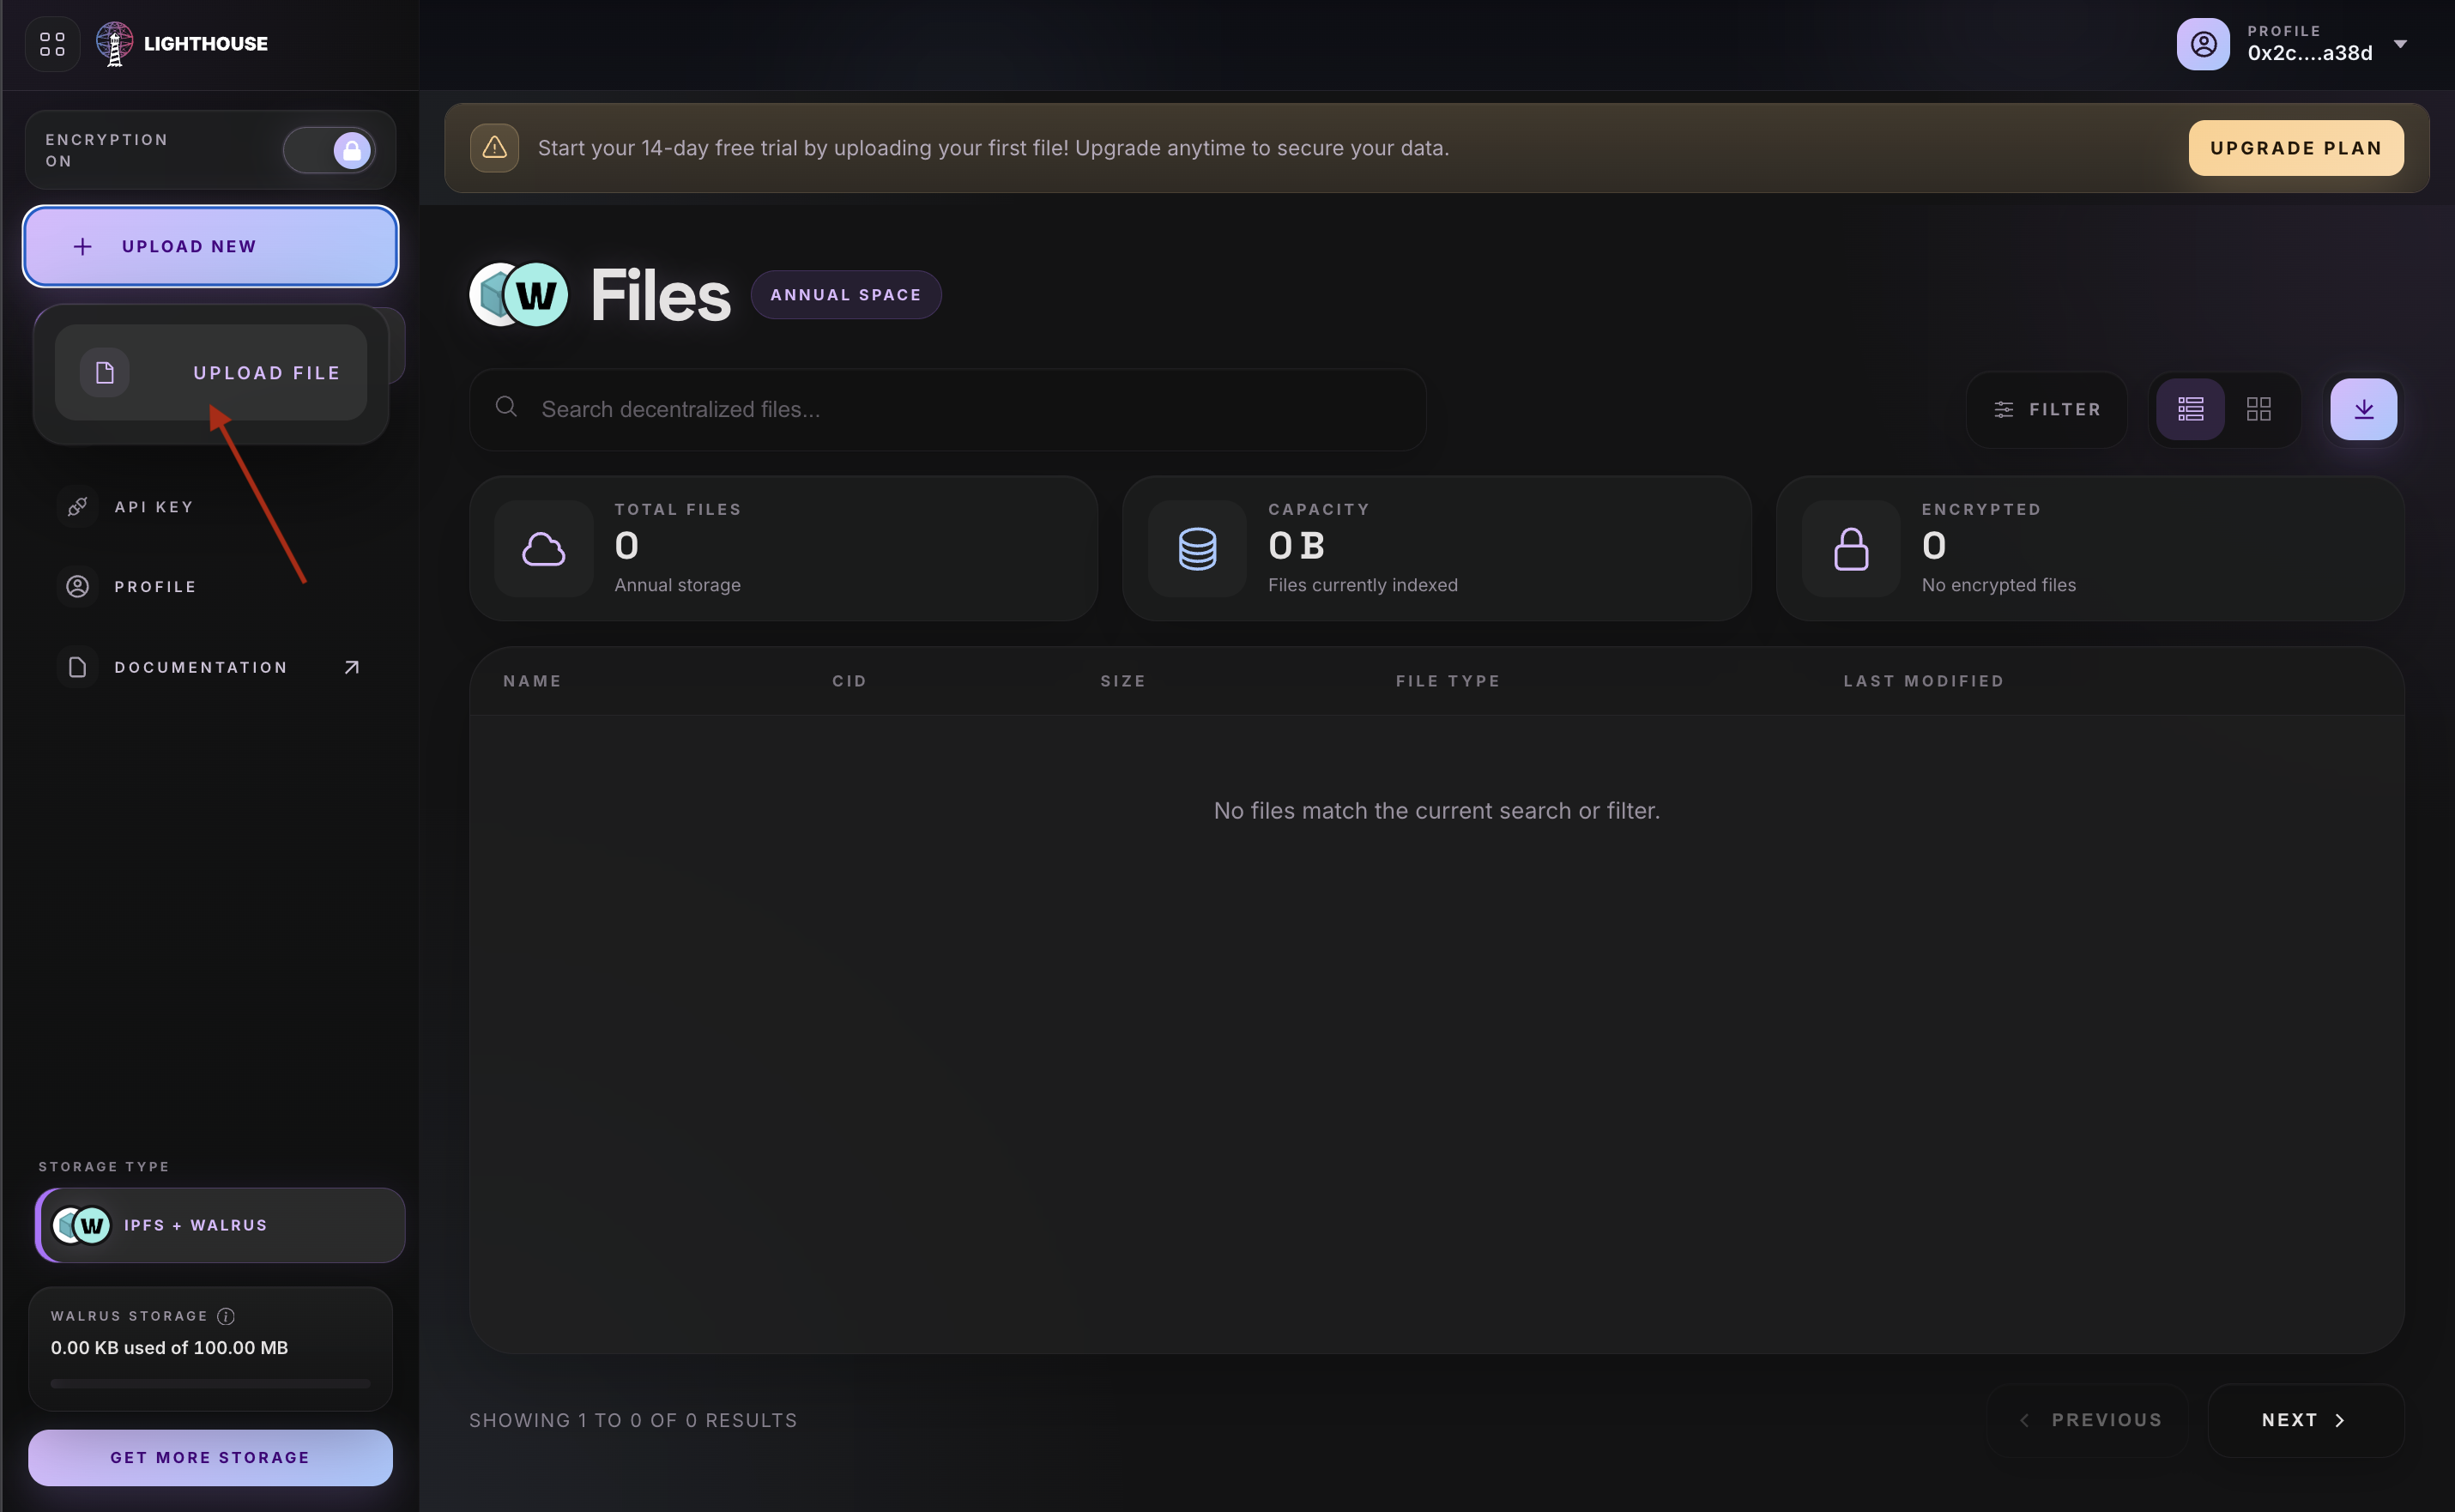
Step 2: Click Upload File
Click the Upload button in the dashboard and choose Upload File. With encryption enabled, this will trigger the encrypted upload flow instead of a plain upload.
Step 3: Select Your File
Choose the file you want to upload from your local filesystem. The Dapp will display the file name and size. There are no file type restrictions — SEAL encrypts any binary data.
Lighthouse calculates the file size to determine the Walrus storage cost, and the on-chain Sui transaction fee for creating your access control object.
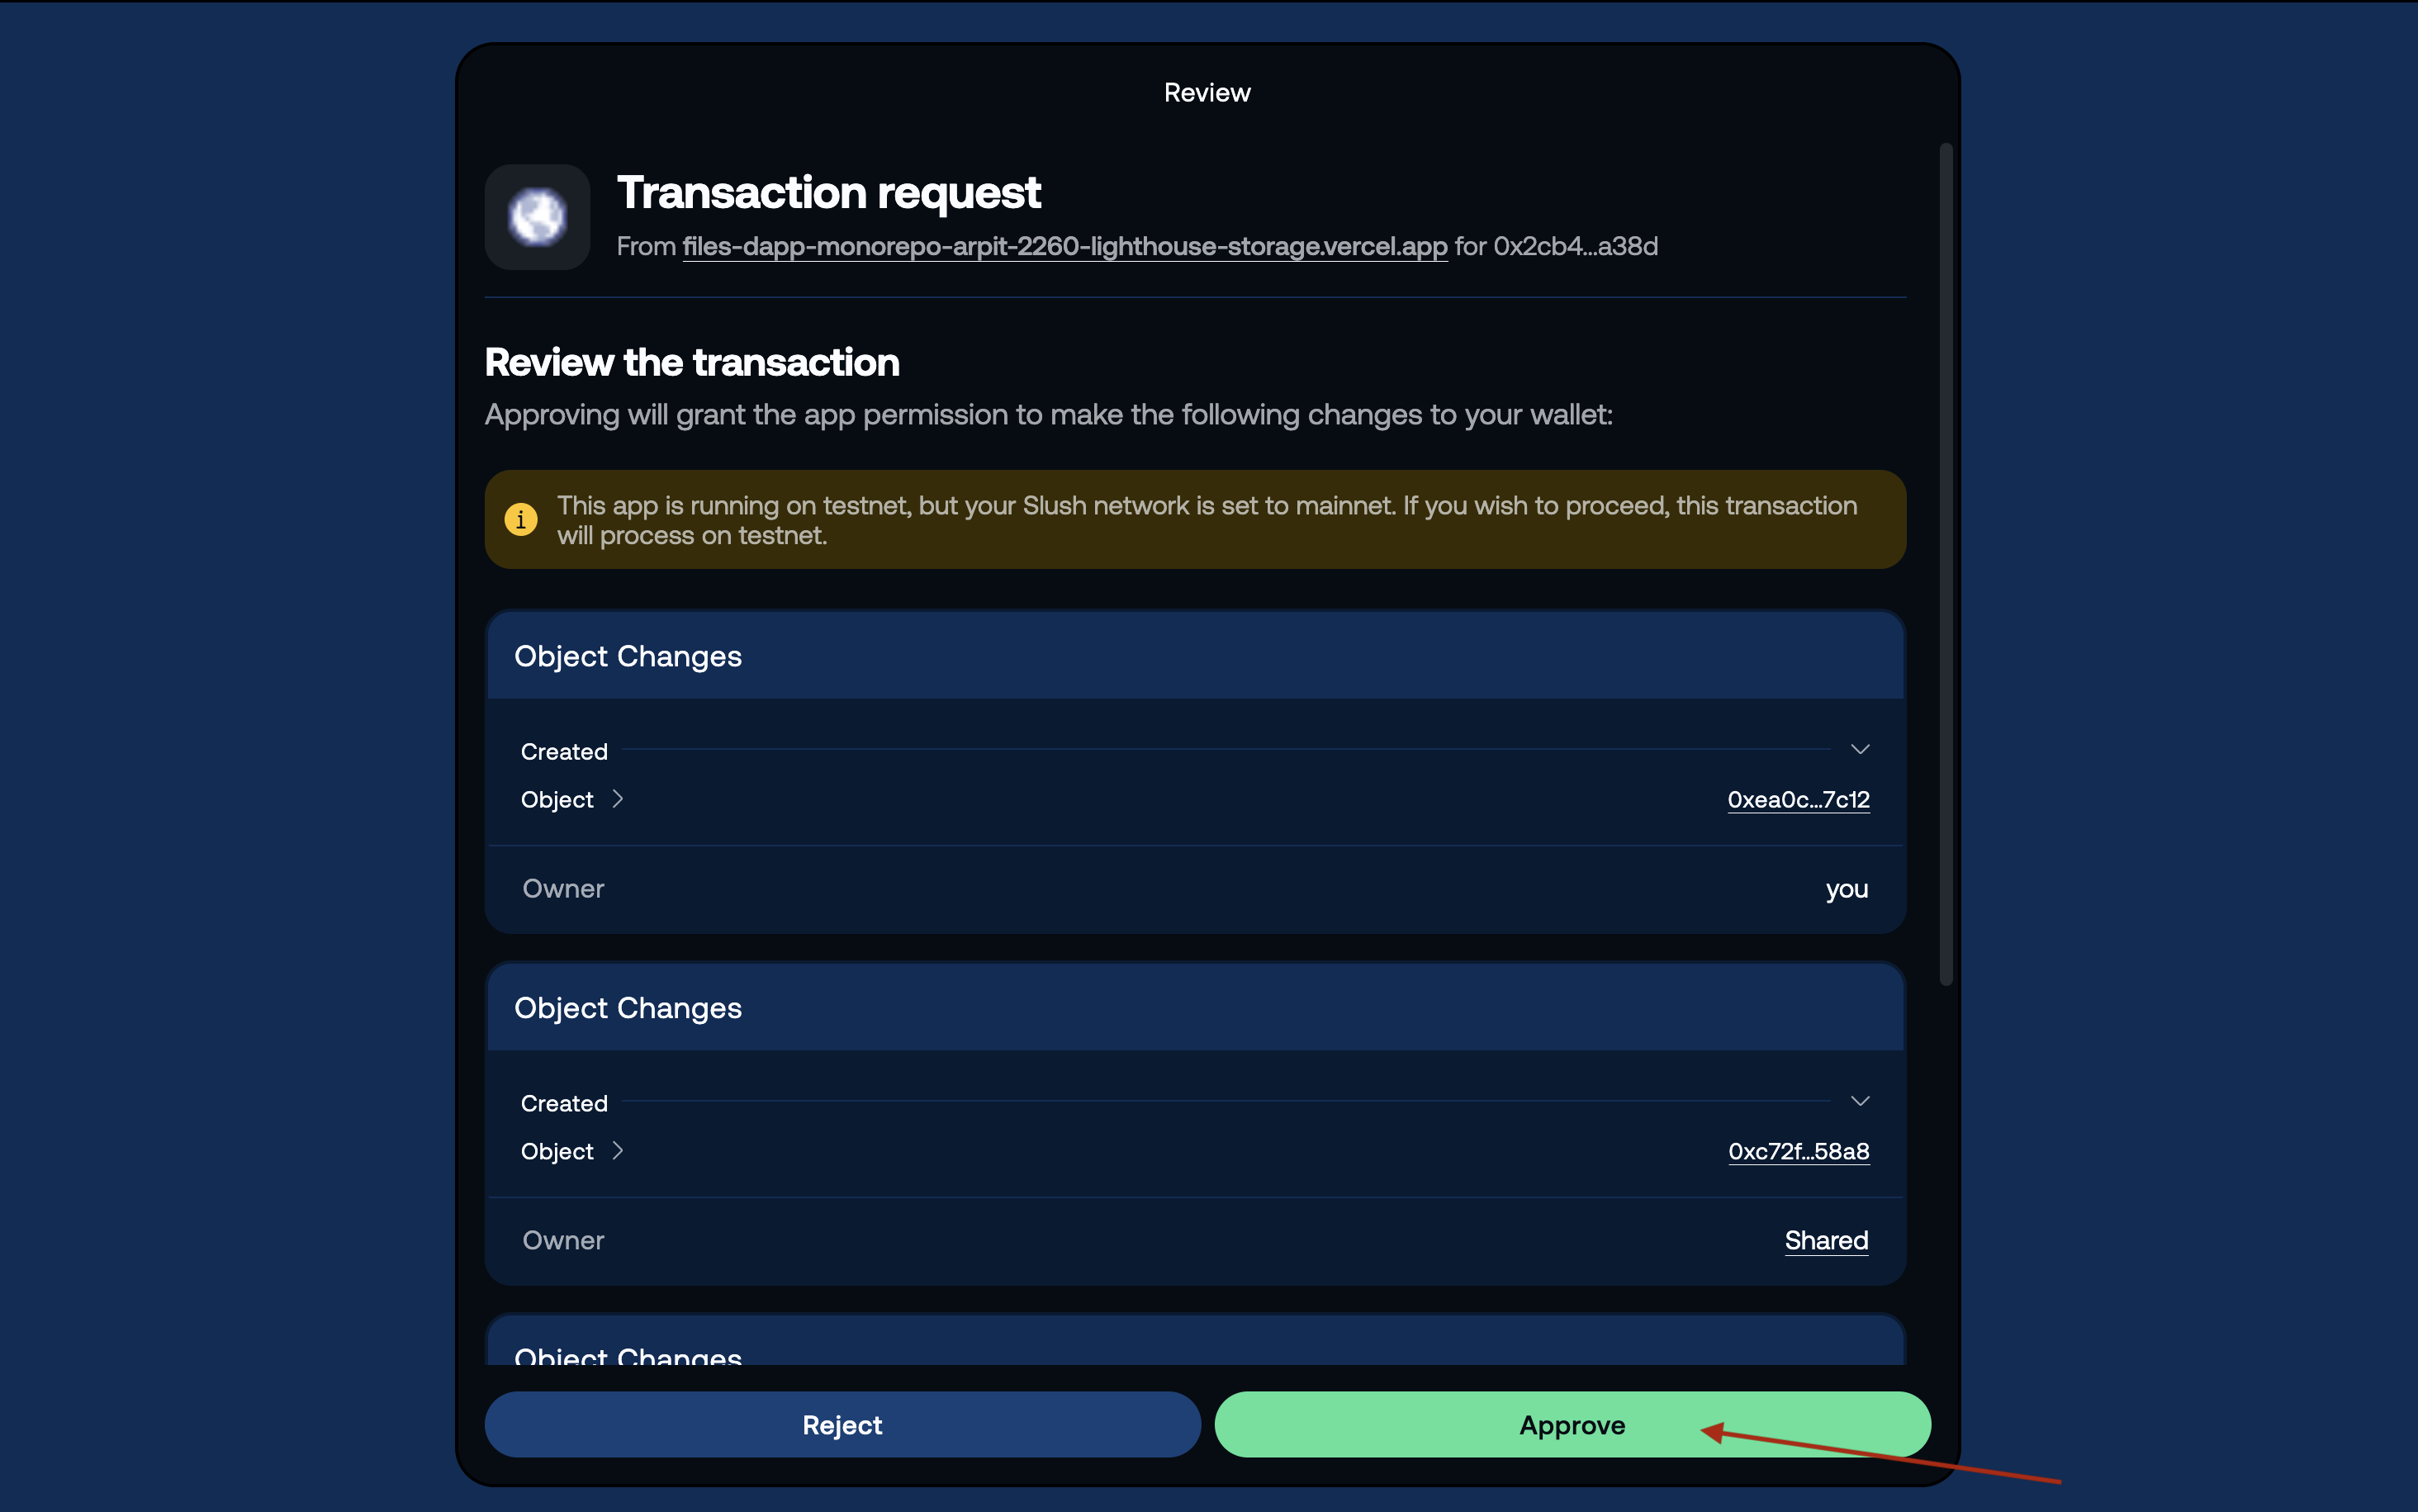
Step 4: Sign the On-Chain Transaction
Once you confirm the upload, your Sui wallet will prompt you to sign a transaction. This transaction:
- Creates a Sui on-chain object that serves as the encryption identity for SEAL's Identity-Based Encryption (IBE) scheme
- The object defines the file's access control, determining who can decrypt it
Step 5: Client-Side Encryption & Upload
After you sign the transaction:
- A random symmetric encryption key is generated on your device.
- Your file is encrypted entirely on the client side using this key.
- The symmetric key is encrypted (encapsulated) using SEAL's Identity-Based Encryption (IBE), with the on-chain object serving as the encryption identity.
- The encrypted file is then uploaded to Walrus. Lighthouse never sees your file in plaintext—only encrypted data is transmitted and stored.
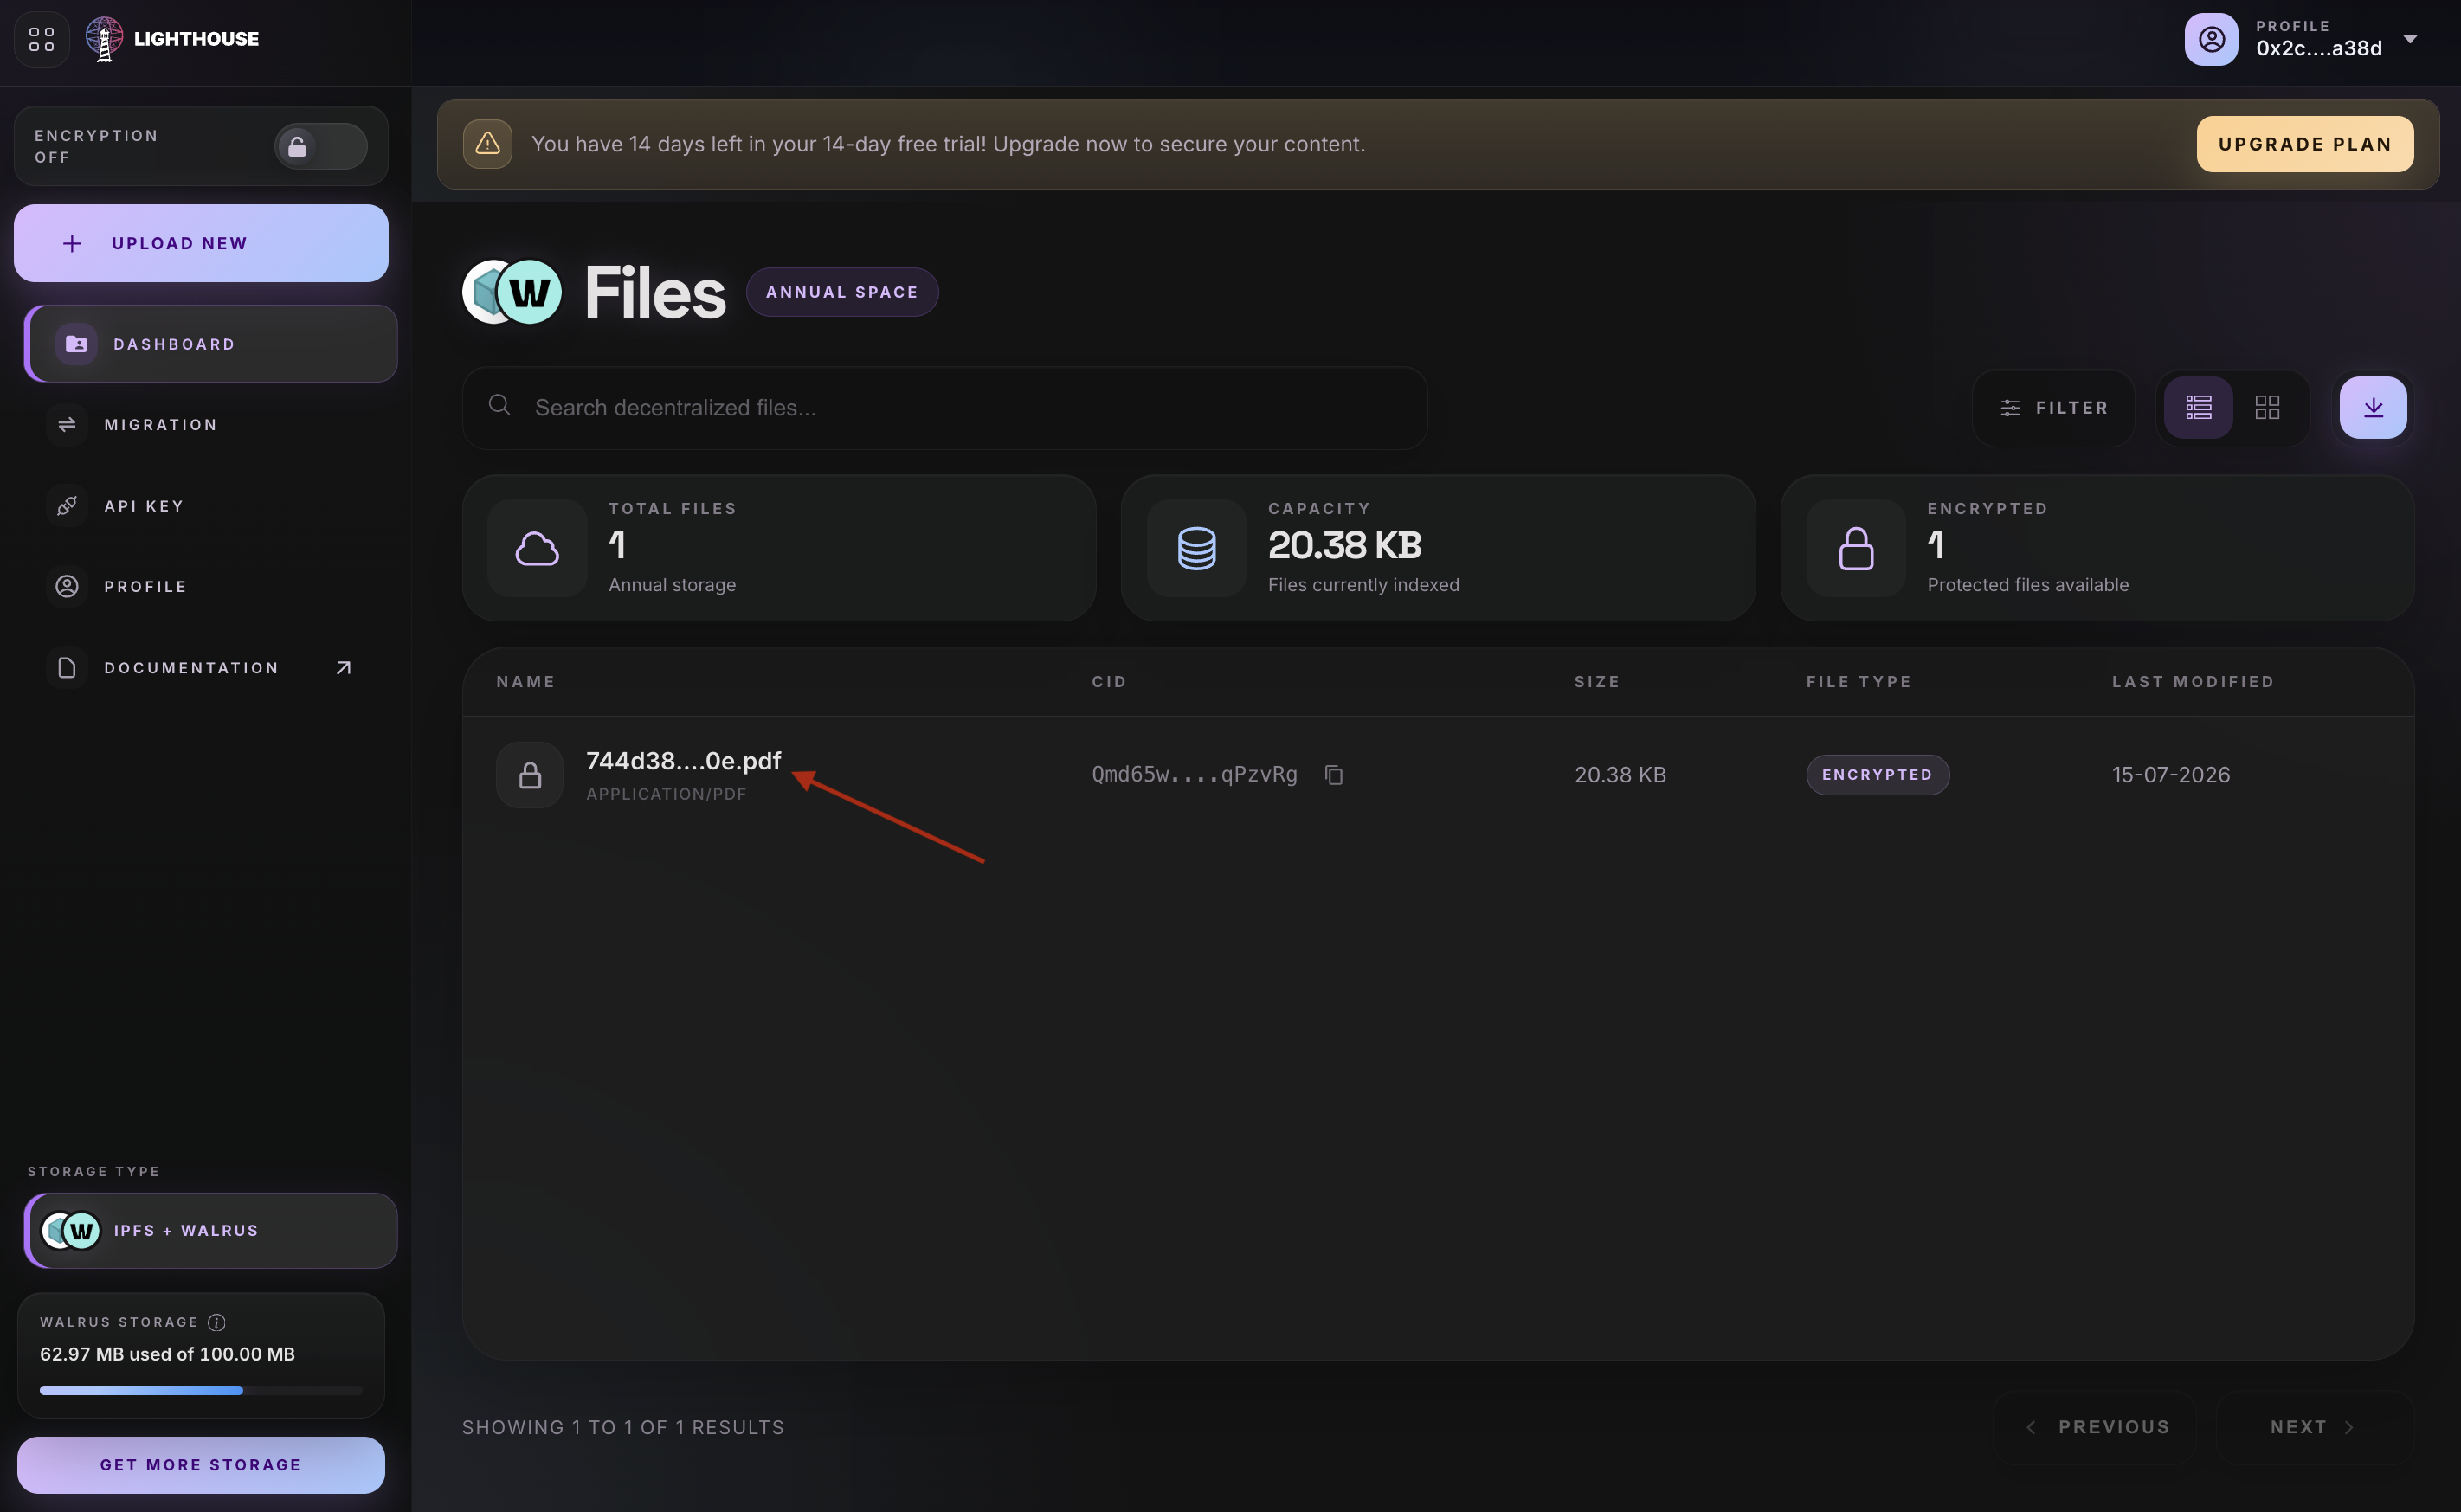
Once complete, Lighthouse returns the IPFS CID for your encrypted file. You'll see it listed in your files dashboard with a lock icon indicating it's encrypted.
Decrypting an Encrypted File
To access your encrypted file:
Step 1: Click the File
From your files list, click on the encrypted file you want to decrypt. Files with a lock icon are encrypted and require proof of ownership to access.
Step 2: Prove Ownership via Signature
A signature request will appear in your Sui wallet. By signing this message, you:
- Prove ownership of the wallet address that has permission to decrypt the file's on-chain encryption object.
- Authorize your client to establish a temporary authenticated session with SEAL, allowing it to request the decryption key material from SEAL key servers for a limited time.
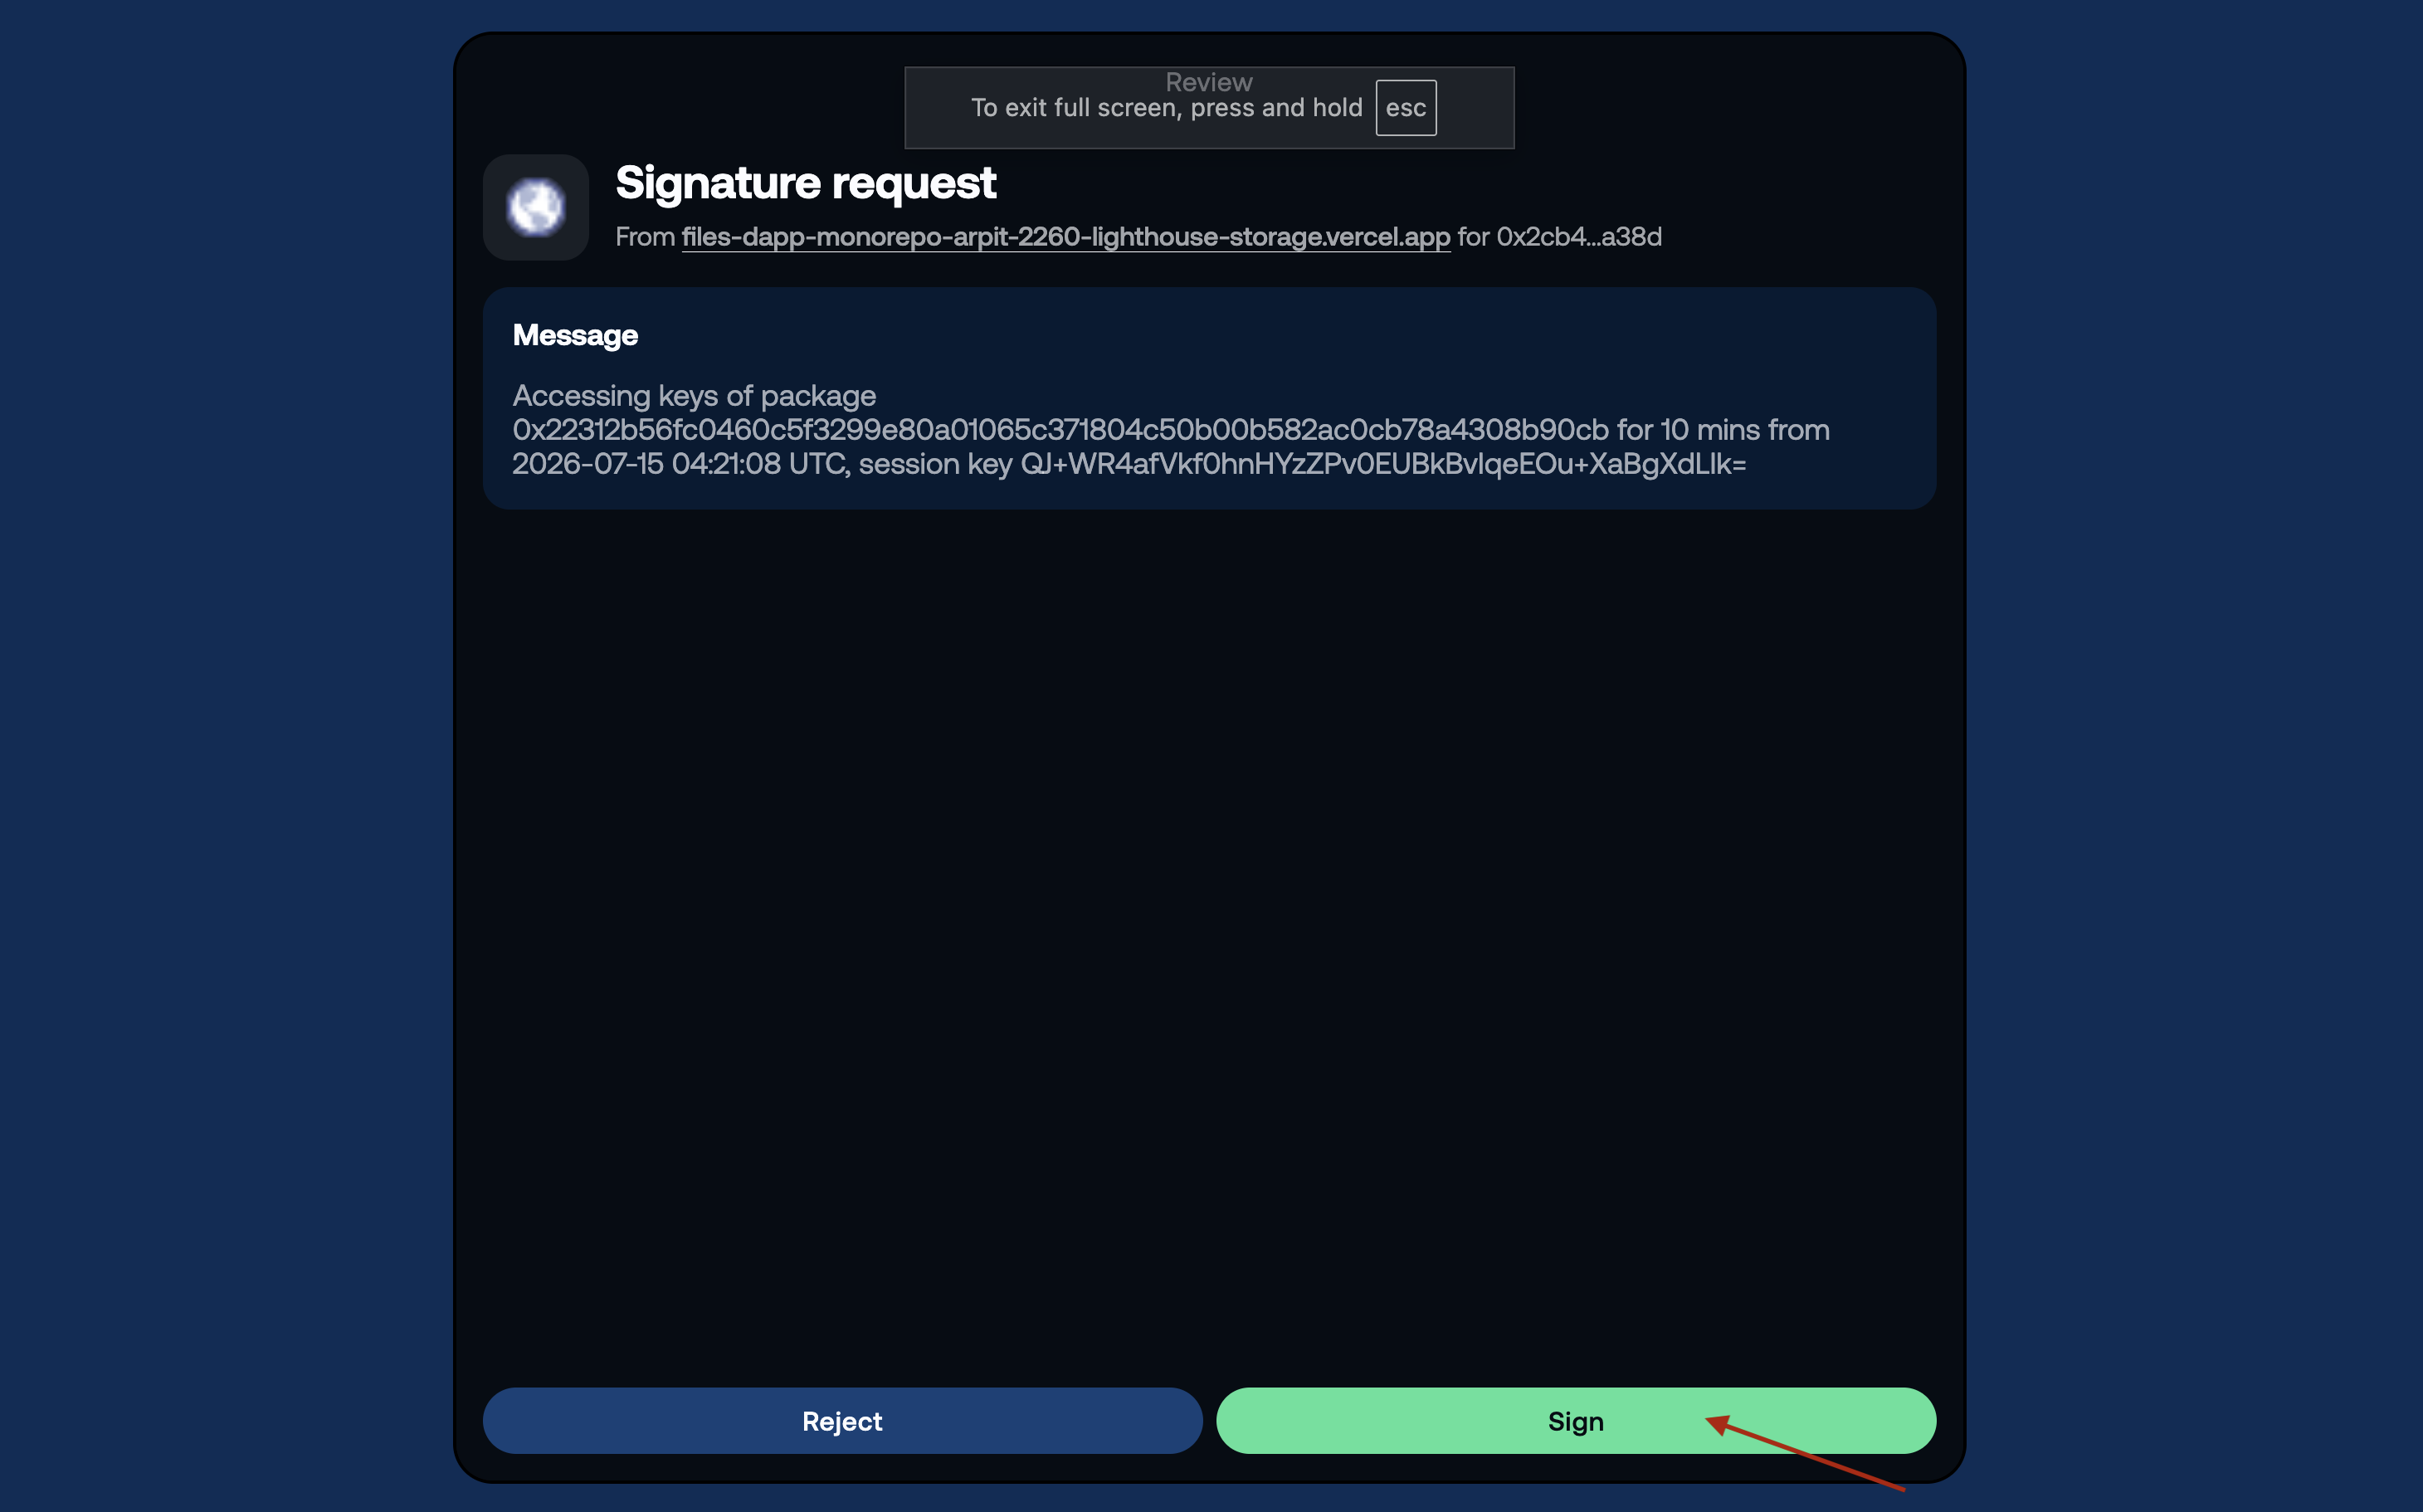
Session keys are short-lived credentials issued after you prove ownership of your wallet. They allow your client to authenticate with SEAL key servers without requiring you to sign every key request.
Step 3: Retrieve Key Shares & Decrypt the File
Once your authenticated session is established:
- Your client requests the IBE decryption key material from the SEAL key servers.
- Each key server verifies that your wallet has permission to decrypt the file before returning its key share.
- The key shares are combined locally on your device to reconstruct the IBE decryption key.
- The IBE decryption key is used to decrypt the encrypted symmetric key.
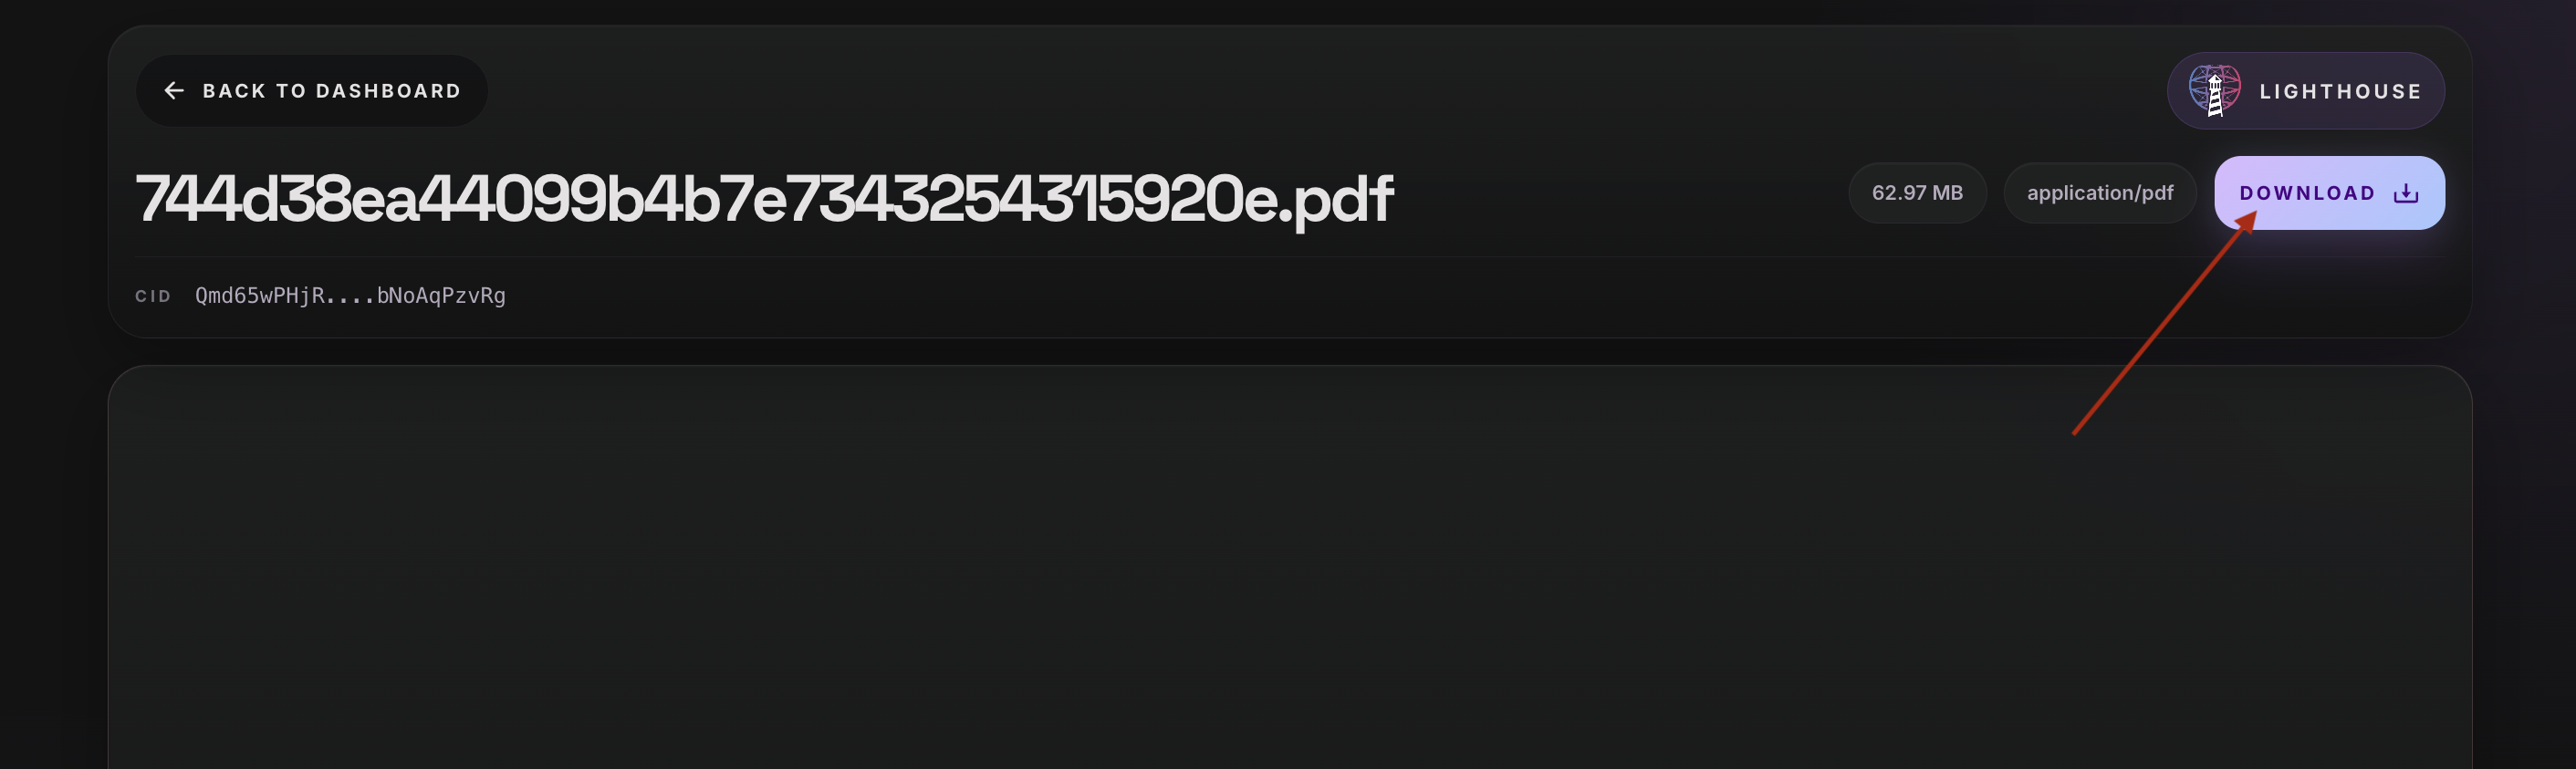
- The encrypted file is fetched from Walrus and decrypted entirely on the client side using the recovered symmetric key.
At no point do Lighthouse or the SEAL key servers have access to:
- Your plaintext file
- The recovered symmetric encryption key
- The decrypted file contents
All encryption and decryption operations are performed locally on your device.
Upload an Encrypted File
You need a Walrus API key created with your Sui address before uploading.
The upload flow consists of four steps:
- Configure a SEAL client.
- Create a
FileAllowlistobject on Sui. - Encrypt your file using the allowlist object as the encryption identity.
- Upload the encrypted file to Walrus.
Step 1: Configure Constants
Lighthouse provides a pre-deployed allowlist package that integrates with SEAL.
export const ORIGINAL_PACKAGE_ID =
  "0x22312b56fc0460c5f3299e80a01065c371804c50b00b582ac0cb78a4308b90cb";

export const LATEST_PACKAGE_ID =
  "0x89815d9feb1e8e526bed4b3c7ad35056a6abf692f293103f435d909180cecb7d";

export const KEY_SERVER_OBJECT_IDS = [
  "0x73d05d62c18d9374e3ea529e8e0ed6161da1a141a94d3f76ae3fe4e99356db75",
  "0xf5d14a81a982144ae441cd7d64b09027f116a468bd36e7eca494f750591623c8",
];

export const THRESHOLD = 2;
export const SESSION_TTL_MIN = 30;
Where:
ORIGINAL_PACKAGE_IDis the original package ID used by SEAL as the encryption identity.LATEST_PACKAGE_IDis the currently published package used when invoking Move functions.KEY_SERVER_OBJECT_IDSare the public SEAL key servers.THRESHOLDis the minimum number of key server responses required for decryption.SESSION_TTL_MINcontrols how long a session key remains valid.
SEAL distinguishes between the original package ID and the latest published package ID.
- The original package ID is used by SEAL when deriving the encryption identity and creating session keys.
- The latest package ID is used when invoking Move functions such as
create_entryandseal_approve.
If the package is upgraded, the latest package ID may change while the original package ID remains the same.
Step 2: Configure the SEAL Client
Create a SealClient using the Lighthouse SEAL key servers.
import { SealClient } from "@mysten/seal";

export const sealClient = new SealClient({
  suiClient,
  serverConfigs: KEY_SERVER_OBJECT_IDS.map((objectId) => ({
    objectId,
    weight: 1,
  })),
  verifyKeyServers: false,
});
The SEAL client is responsible for:
- Encrypting files locally.
- Communicating with SEAL key servers.
- Retrieving decryption key material for authorized users.
Step 3: Create a FileAllowlist Object
Lighthouse provides a deployed allowlist contract that is compatible with SEAL.
Every encrypted file requires a unique FileAllowlist object. This object:
- Creates a Sui on-chain object whose object ID serves as the encryption identity for SEAL's Identity-Based Encryption (IBE) scheme.
- Stores the list of wallets that are allowed to decrypt the file.
Create the object before encrypting the file.
import { Transaction } from "@mysten/sui/transactions";

export async function createFileAllowlist(
  keypair: Keypair,
  name = "",
) {
  const tx = new Transaction();

  tx.moveCall({
    target: `${LATEST_PACKAGE_ID}::allowlist::create_entry`,
    arguments: [
      tx.pure.string(name),
    ],
  });

  const result = await suiClient.signAndExecuteTransaction({
    signer: keypair,
    transaction: tx,
    options: {
      showObjectChanges: true,
    },
  });

  await suiClient.waitForTransaction({
    digest: result.digest,
  });

  const created = result.objectChanges?.find(
    (c) =>
      c.type === "created" &&
      c.objectType.includes("::allowlist::FileAllowlist"),
  );

  if (!created || created.type !== "created") {
    throw new Error("FileAllowlist was not created");
  }

  return created.objectId;
}
After the transaction succeeds you'll receive the FileAllowlist object ID.
This object ID is used as the SEAL encryption identity in the next step.
Step 4: Encrypt the File
Once you've created the FileAllowlist object, use its object ID as the encryption identity when calling SEAL.
const { encryptedObject } = await sealClient.encrypt({
  threshold: THRESHOLD,
  packageId: ORIGINAL_PACKAGE_ID,
  id: fileAllowlistId,
  data,
});
Where:
packageIdis the original Lighthouse allowlist package ID used by SEAL.idis theFileAllowlistobject ID returned from the previous step.datais the file or binary data you want to encrypt.thresholdspecifies how many SEAL key server responses are required before the client can reconstruct the IBE decryption key.
During encryption:
- A random symmetric encryption key is generated.
- Your file is encrypted locally using that key.
- The symmetric key is protected using SEAL's Identity-Based Encryption (IBE), with the
FileAllowlistobject acting as the encryption identity.
The result is an encrypted object that can be uploaded to Walrus and can only be decrypted by wallets authorized in the allowlist.
Step 5: Upload the Encrypted File
Upload the encryptedObject returned by SEAL to Walrus using the Lighthouse SDK.
const response = await lighthouse.upload(
  encryptedObject,
  "YOUR_API_KEY",
  {
    storageType: "walrus",
  }
);
The returned CID references the encrypted file stored on Walrus.
Since encryption happens entirely on the client side, Lighthouse never has access to the plaintext contents of your file.
Decrypt an Encrypted File
To decrypt a file, you'll need:
- The file's CID on Walrus.
- The
FileAllowlistobject ID that was created during encryption. - The same wallet that has permission to decrypt the file.
The decryption flow consists of four steps:
- Create a temporary SEAL session.
- Download the encrypted file from Walrus.
- Build a SEAL approval transaction.
- Decrypt the file locally.
Step 1: Create a Session Key
Before requesting decryption keys from the SEAL key servers, create a temporary session key. This session key proves ownership of your wallet and allows your client to authenticate with the key servers.
export async function createSessionKey(
  keypair: Keypair,
): Promise<SessionKey> {
  const sessionKey = await SessionKey.create({
    address: keypair.toSuiAddress(),
    packageId: ORIGINAL_PACKAGE_ID,
    ttlMin: SESSION_TTL_MIN,
    signer: keypair,
    suiClient,
  });

  const { signature } = await keypair.signPersonalMessage(
    sessionKey.getPersonalMessage(),
  );

  await sessionKey.setPersonalMessageSignature(signature);

  return sessionKey;
}
const sessionKey = await createSessionKey(keypair);
Step 2: Download the Encrypted File
Download the encrypted file from Walrus using its CID.
const response = await fetch(
  `https://gateway-walrus.lighthouse.storage/ipfs/${cid}`
);

const encryptedObject = new Uint8Array(
  await response.arrayBuffer()
);
Step 3: Build the SEAL Approval Transaction
Before SEAL releases the decryption key material, your client must prove that your wallet has permission to decrypt the file.
Build a transaction calling the seal_approve function of the Lighthouse allowlist contract.
export async function buildSealApproveTxBytes(
  packageId: string,
  allowlistId: string,
) {
  const tx = new Transaction();

  tx.moveCall({
    target: `${packageId}::allowlist::seal_approve`,
    arguments: [
      tx.pure.vector("u8", fromHex(allowlistId)),
      tx.object(allowlistId),
    ],
  });

  return tx.build({
    client: suiClient,
    onlyTransactionKind: true,
  });
}
const txBytes = await buildSealApproveTxBytes(
  LATEST_PACKAGE_ID,
  fileAllowlistId,
);
The transaction is not executed on-chain. SEAL verifies it before issuing the decryption key material.
Step 4: Decrypt the File
Once the session key, encrypted file, and approval transaction are ready, decrypt the file.
const decrypted = await sealClient.decrypt({
  data: encryptedObject,
  sessionKey,
  txBytes,
});
The returned value is a Uint8Array containing the original plaintext.
For example, to decode a text file:
const plaintext = new TextDecoder().decode(decrypted);
During decryption:
- Your client authenticates with the SEAL key servers using the session key.
- The approval transaction proves that your wallet has permission to decrypt the file.
- The key servers return their IBE key shares.
- The IBE decryption key is reconstructed locally on your device.
- The symmetric encryption key is recovered.
- The file is decrypted entirely on the client side.
At no point do Lighthouse or the SEAL key servers have access to your plaintext file or the recovered symmetric encryption key.